Your Complete Step-by-Step Guide to a
DIY Installation of Fake Grass
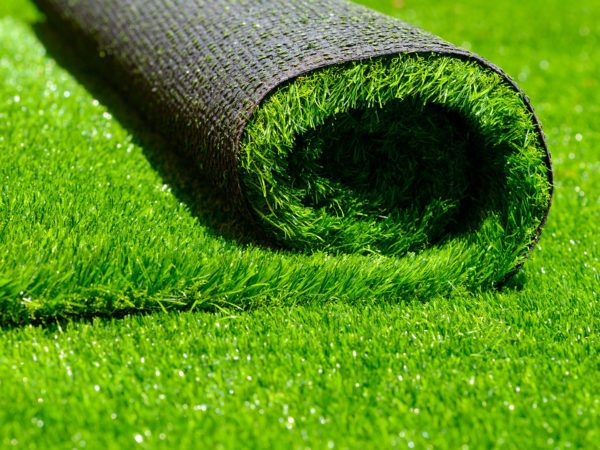
Creating your own backyard putting green with artificial turf has become increasingly popular among golf enthusiasts looking to practice their short game at home. With the right materials, proper planning, and careful execution, DIY installation of fake grass for putting greens can transform your outdoor space into a professional-quality practice area. This comprehensive guide will walk you through every step of the process, from initial planning to final touches, ensuring your artificial turf putting green provides years of enjoyment and skill improvement.
Understanding Artificial Turf for Putting Greens
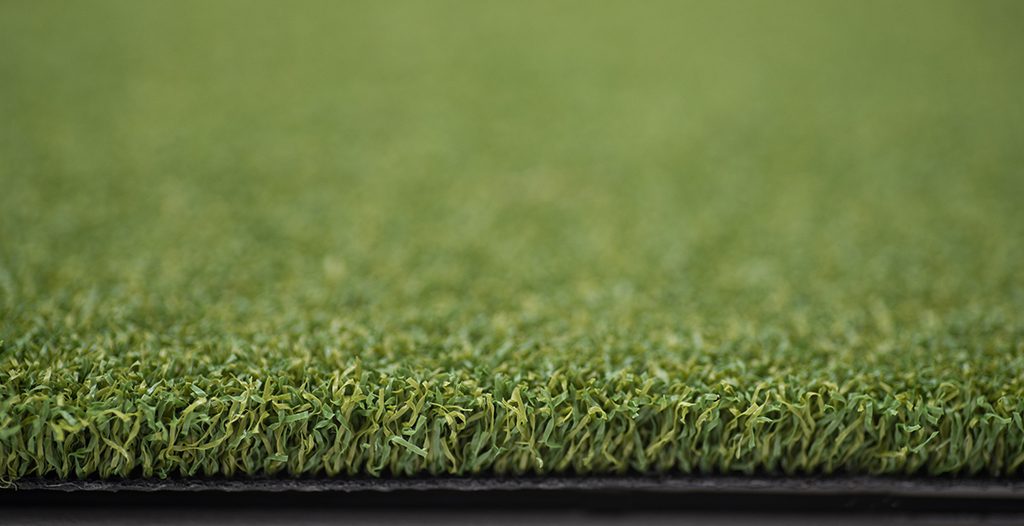
Artificial turf specifically designed for putting greens differs significantly from standard lawn artificial grass. The specialized synthetic turf features shorter pile heights, typically ranging from 10mm to 15mm, which allows for proper ball roll and consistent putting performance. Silica sand is the most cost-effective choice for putting greens, weighing down artificial grass while providing a smooth surface for accurate ball roll. This infill material, distributed at approximately 1-2 pounds per square foot, creates the ideal playing surface that mimics natural grass greens.
The quality of artificial turf varies considerably, with premium products offering superior durability, UV resistance, and realistic appearance. When selecting fake grass for your putting green project, consider factors such as fiber density, backing material, and drainage capabilities. High-quality synthetic turf maintains its appearance and performance characteristics for 15-20 years with proper installation and maintenance.
Professional-grade putting green turf incorporates advanced fiber technology that provides consistent ball speed and direction. The synthetic fibers are engineered to minimize friction while maintaining enough texture to control ball movement. This balance is crucial for creating an authentic putting experience that helps improve your golf game.
Essential Tools and Materials for DIY Installation
Successful artificial turf installation requires specific tools and materials to achieve professional results. The foundation of any quality putting green begins with proper excavation equipment, including shovels, a plate compactor, and leveling tools. A laser level or string line level ensures precise grading, which is critical for proper ball roll and water drainage.
For the base preparation, you’ll need crushed stone or decomposed granite, landscape fabric for weed prevention, and edge restraints to contain the artificial turf. As a rule of thumb, go four to five inches deep for a crushed rock base. Spray a ground-clearing, long-term weed killer and put down a layer of landscape fabric over the bare dirt to ensure weeds and grass won’t grow back.
The turf installation phase requires specialized tools including a utility knife with replacements blades, seaming tape, outdoor adhesive, and a power broom for final grooming. A broadcast spreader ensures even distribution of infill materials, while a water-filled roller helps achieve proper compaction. Don’t overlook safety equipment such as knee pads, work gloves, and eye protection during the installation process.
Site Planning and Design Considerations
Effective site planning forms the foundation of a successful DIY putting green installation. Begin by selecting a location that receives adequate sunlight and has natural drainage away from structures. The size of your putting green will depend on available space and intended use, with most home installations ranging from 200 to 800 square feet.
Consider incorporating subtle slopes and contours to create interesting putting challenges while maintaining proper drainage. Natural topography can enhance the playing experience, but avoid excessive slopes that could cause water pooling or uneven wear patterns. Design elements such as sand traps, rough areas, or multiple pin positions can add complexity and enjoyment to your practice sessions.
Mark the perimeter of your planned putting green using spray paint or stakes and string. This visual boundary helps you assess the design from different angles and make adjustments before beginning excavation. Take into account existing landscape features, underground utilities, and proximity to irrigation systems during the planning phase.
Excavation and Base Preparation
Proper excavation sets the stage for a long-lasting artificial turf installation. Excavate 3-5 inches of the native soil; an optional weed barrier may be laid down on top of the excavated area. Fill in 2 inches with a crushed rock base, compacted to 90%-95% compaction, leaving about 3 inches before reaching the height of the concrete edge.
Begin excavation by removing all organic material, including grass, roots, and debris from the designated area. The excavation depth should account for the base material, artificial turf thickness, and desired final grade. Maintain consistent depth across the entire area to ensure uniform drainage and appearance.
Create proper drainage by establishing a gentle slope of approximately 1% grade away from structures and toward natural drainage areas. This seemingly minor detail prevents water accumulation that could damage the artificial turf backing or create soft spots in the playing surface. Compact the subgrade soil using a plate compactor to create a stable foundation for the base materials.
Install edge restraints around the perimeter before adding base materials. These barriers contain the crushed rock base and provide clean, finished edges for the artificial turf. Choose materials that complement your landscape design while providing structural integrity for the installation.
Drainage System Installation
A well-designed drainage system is crucial for artificial turf longevity and performance. Poor drainage can lead to water accumulation, turf backing deterioration, and uneven playing surfaces. The base material selection plays a vital role in drainage effectiveness, with angular crushed stone providing superior water flow compared to rounded materials.
Install perforated drain pipes in areas prone to water collection, connecting them to existing drainage systems or dry wells. The drain pipes should be surrounded by gravel and covered with filter fabric to prevent clogging from fine particles. This subsurface drainage network works in conjunction with the permeable base to manage water flow effectively.
Consider the long-term maintenance of your drainage system during installation. Access points for cleaning drain lines and inspection of critical areas will prove valuable over the life of your putting green. Proper documentation of drain locations helps with future maintenance and prevents accidental damage during landscape modifications.
Artificial Turf Installation Process
The installation of artificial turf requires precision and attention to detail to achieve professional results. Begin by rolling out the synthetic grass in the same direction to ensure uniform appearance and consistent ball roll. Allow the turf to acclimate to ambient temperature for at least 30 minutes before cutting to final dimensions.
Begin by inserting the seaming tape between two pieces of artificial grass. Secure it with staples or turf nails. Then, apply the adhesive following the directions on the packaging. Make sure to cover the entire length of the tape and press down firmly on both pieces. Proper seaming technique creates invisible joints that maintain the aesthetic appeal and playing characteristics of your putting green.
Use sharp utility knives to trim excess material, cutting from the backing side to achieve clean edges. Work slowly and check measurements frequently to avoid costly mistakes. The artificial turf should fit snugly within the edge restraints without buckling or gaps that could affect ball roll.
Secure the perimeter of the artificial turf using landscape staples or nails spaced every 6-8 inches. Drive fasteners flush with the turf backing to prevent interference with ball movement. Pay special attention to high-traffic areas and edges that may experience greater stress over time.
Infill Application and Surface Preparation
The infill process transforms artificial turf from a simple covering into a functional putting surface. Silica sand infill provides weight, stability, and the proper playing characteristics for golf ball interaction. The distribution process requires patience and precision to achieve consistent coverage across the entire surface.
Using a broadcast spreader, apply the infill material in multiple light passes rather than attempting to achieve full coverage in a single application. This technique ensures even distribution and prevents over-application in specific areas. Work the infill into the turf fibers using a stiff brush or power broom, ensuring complete penetration to the backing level.
The final infill depth should allow turf fibers to stand upright while providing adequate support for ball roll. Insufficient infill results in soft spots and inconsistent ball behavior, while excessive infill can create a hard, unnatural playing surface. Test ball roll in multiple directions during the infill process to identify and correct any issues.
Water the completed surface lightly to settle the infill and remove any dust or debris from the installation process. This initial watering also helps identify any drainage issues that may require attention before the putting green is ready for play.
Professional Installation vs DIY Considerations
While DIY installation can provide significant cost savings, certain aspects of putting green construction benefit from professional expertise. Because artificial putting greens require greater expertise in grading and leveling to provide adequate gameplay, it’s not recommended to DIY these types of projects. It’s also during this base prep and ground compaction step that we can build additional contours and shapes into your putting green.
Professional installers bring specialized equipment, experience with drainage solutions, and knowledge of local soil conditions that can impact installation success. They also provide warranties and ongoing support that protect your investment over time. Complex designs with multiple elevations, integrated lighting, or advanced drainage systems typically require professional installation to achieve optimal results.
However, many homeowners successfully complete DIY putting green installations with careful planning, quality materials, and attention to detail. The key to success lies in realistic assessment of your skills, available time, and willingness to invest in proper tools and materials. Start with simpler designs and gradually develop expertise before attempting more complex installations.
Consider a hybrid approach where professionals handle critical aspects like base preparation and drainage while you complete the turf installation and finishing work. This strategy provides professional expertise where it matters most while allowing you to participate in the creation of your putting green.
Maintenance and Long-term Care
Proper maintenance ensures your artificial turf putting green provides years of reliable service and consistent playing conditions. Regular brushing keeps turf fibers upright and prevents matting in high-traffic areas. A monthly grooming schedule with a stiff brush or power broom maintains optimal appearance and performance.
Infill materials require periodic replenishment as normal use and weather conditions cause gradual displacement. Monitor infill levels quarterly and add material as needed to maintain proper playing characteristics. Deep cleaning with specialized artificial turf cleaners removes organic buildup and maintains sanitary conditions.
Inspect drainage systems annually, clearing any debris from drain outlets and checking for signs of water accumulation. Address drainage issues promptly to prevent damage to the artificial turf backing or base materials. Well-maintained drainage extends the life of your installation significantly.
Professional deep cleaning and maintenance services can supplement your regular care routine, particularly for heavily used putting greens or installations in challenging environmental conditions. These services use specialized equipment and techniques that restore playing characteristics and extend turf life.
Cost Analysis and Budgeting
Understanding the complete cost of DIY artificial turf installation helps you make informed decisions about materials, scope, and timing. In 2025, backyard putting green costs are $20–$30 per sq. ft. for greens 400 sq. ft. and larger, while smaller areas (under 400 sq. ft.) typically exceed $30 per sq. ft. DIY installation can reduce these costs by 40-60%, depending on the complexity of your project and choice of materials.
Material costs represent the largest expense, with quality artificial turf accounting for 60-70% of the total budget. Base materials, drainage components, and edge restraints comprise most of the remaining material costs. Tool purchases or rentals add to the initial investment but can be amortized across future projects.
Factor in hidden costs such as soil disposal, utility location services, and potential complications discovered during excavation. Allow 15-20% contingency in your budget for unexpected expenses that commonly arise during excavation and installation phases.
Compare DIY costs against professional installation quotes to determine the best value for your situation. While DIY installation requires significant time investment, the cost savings often justify the effort for motivated homeowners with basic construction skills.
Troubleshooting Common Installation Issues
Even carefully planned installations can encounter challenges that require problem-solving skills and adaptation. Poor drainage manifests as water pooling on the surface or soft spots that affect ball roll. These issues typically stem from inadequate base preparation or improper grading during installation.
Visible seams indicate problems with turf alignment, adhesive application, or edge preparation. Rework seaming joints by lifting the affected area, cleaning old adhesive, and reapplying with proper technique. Take time to ensure grain direction matches and edges align perfectly before final bonding.
Uneven ball roll often results from inconsistent infill distribution or base irregularities. Use a straightedge to identify high and low spots, then adjust infill levels accordingly. Severe base irregularities may require partial excavation and releveling to achieve acceptable playing conditions.
Premature turf wear in high-traffic areas suggests inadequate base preparation or insufficient infill support. Address these issues promptly to prevent further damage and maintain consistent playing characteristics across the entire surface.
Conclusion
Creating a DIY artificial turf putting green represents an achievable project for motivated homeowners willing to invest time and attention to detail. Success depends on thorough planning, quality materials, and adherence to proven installation techniques. While challenging aspects exist, the satisfaction of creating a personal practice facility and the long-term enjoyment it provides make the effort worthwhile.
The key to successful DIY installation lies in understanding each phase of the process and executing with patience and precision. From initial site preparation through final infill application, each step contributes to the overall quality and longevity of your putting green. Take time to research materials, plan thoroughly, and don’t hesitate to consult professionals when encountering complex challenges.
Your completed artificial turf putting green will provide years of practice opportunities, entertainment value, and property enhancement. The skills developed during installation serve you well for future landscape projects, while the finished product becomes a focal point of your outdoor living space. Whether practicing for tournament play or enjoying casual family putting contests, your DIY putting green represents a lasting investment in recreation and property value.
For professional artificial turf installation services in Randburg and Midrand, contact LawnKing Gardens at 068 474 7303. Our experienced team provides comprehensive solutions for residential and commercial artificial grass needs throughout Gauteng.
Related Resources
- How To Install Putting Green Artificial Grass – Professional installation guide from LawnKing Gardens
- Considerations in DIY Artificial Turf Installation at Home – Important factors for home installations
- All about Artificial Turf Sub-base – Detailed drainage and foundation information
- 35mm Artificial Grass – Premium turf options for various applications
- Guide To Artificial Sports Turf for Tennis Courts – Sports surface expertise from LawnKing Gardens
- The Home Depot DIY Putting Green Guide – Additional installation resources
- Purchase Green Installation Guide – Professional installation techniques
Recent Posts: