Cladding Installation Mistakes to Avoid
Property owners in Honeydew and Northriding often invest significant resources into enhancing their outdoor spaces. However, many overlook critical installation errors that can compromise both the appearance and longevity of their cladding systems. Understanding these common cladding installation mistakes helps you protect your investment and maintain a stunning property for years to come.
Why Proper Cladding Installation Matters in Honeydew and Northriding
The northern suburbs of Johannesburg experience unique weather patterns. From intense summer heat to afternoon thunderstorms, your cladding faces constant environmental challenges. Moreover, proper installation ensures your property maintains its value and curb appeal. Therefore, avoiding common mistakes becomes essential for every homeowner in these areas.
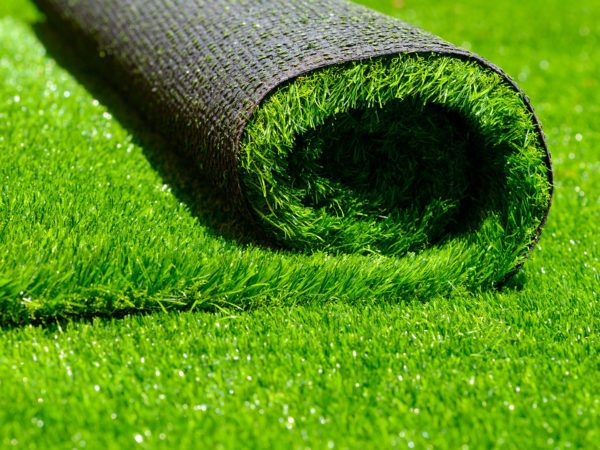
At LawnKing Gardens, we understand how outdoor installations work together. Just as we ensure proper artificial grass installation requires attention to detail, cladding demands the same level of precision. Consequently, learning from common errors saves you both time and money.
Poor Surface Preparation Creates Future Problems
Many installers rush through preparation stages. They fail to thoroughly clean surfaces of debris, dust, and uneven textures. This creates a domino effect of problems that compromises the entire cladding system.
First, check your wall surface carefully. Remove all loose paint, dirt, and moisture. Next, ensure the surface remains level and smooth. Any irregularities will show through the finished cladding, creating an unprofessional appearance.
Additionally, moisture management starts at the preparation phase. Install a high-quality breather membrane before mounting any cladding panels. This protects the underlying structure while allowing vapor to escape naturally. Without this crucial barrier, water seeps behind panels, leading to mold growth and structural damage over time.
Using Incorrect Fixings Compromises Structural Integrity
One of the gravest errors involves using inappropriate fasteners. Rusty nails bleeding brown stains onto pristine cladding creates an eyesore nobody wants to see. Furthermore, incorrect fixings can lead to loosening over time, creating safety hazards.
Always opt for stainless steel fixings. These eliminate rust risks and remain surprisingly affordable. Moreover, ensure nails measure at least 2.5 times the cladding thickness. Ring-shank nails provide optimal holding strength for long-term durability.
Similarly, avoid overdriving fasteners. Screws installed too deeply can crack cladding panels. Instead, install them flush with the surface while maintaining proper tension. This approach mirrors the precision we use when installing artificial turf sub-bases – attention to detail makes all the difference.
Neglecting Expansion Gaps Causes Warping and Buckling
Wood and composite materials expand and contract with temperature changes. Failing to accommodate this natural movement represents one of the most common cladding installation mistakes. The result? Bulging boards, warping, and potentially dangerous loose sections.
Leave sufficient gaps between boards according to manufacturer specifications. Typically, maintain 2-4mm spacing between timber boards. For composite materials, gaps of 5-10mm at top and bottom prove necessary. Additionally, leave 2-3mm between boards and trims.
Use spacers during installation to maintain consistent gaps. This ensures uniform expansion room throughout the entire system. Remember, cutting corners here leads to expensive repairs later.
Inadequate Ventilation Invites Moisture Damage
Perhaps the most insidious mistake involves improper moisture management and ventilation. Without adequate airflow behind cladding, condensation accumulates rapidly. This creates ideal conditions for mold growth, rot, and structural degradation.
Install properly spaced vertical battening. This creates an essential airflow gap that helps boards dry naturally. Never fix boards directly to panels or fill batten cavities with insulation. Furthermore, avoid fully sealing the cavity at wall tops or bottoms.
Choose battens between 35mm and 50mm in thickness. Space them correctly according to manufacturer instructions – typically 600mm apart. This framework provides necessary support while promoting crucial air circulation. The same principles apply when we install artificial green walls – proper backing structure ensures longevity.
Installing Cladding Too Close to Ground Level
Proximity to the ground accelerates wood decay dramatically. Many installers ignore this simple guideline, resulting in premature deterioration. Maintain a minimum clearance of 300mm between cladding and ground level.
Consider incorporating a skirt of brick, render, or other protective materials. This thoughtful design feature enhances both aesthetics and longevity. Moreover, it prevents water splash-back during heavy rains – common in Honeydew and Northriding during summer months.
Just as we recommend proper height considerations for artificial grass on balconies, cladding requires careful planning regarding ground proximity. Small details make substantial differences in final results.
Overlooking Manufacturer Guidelines Voids Warranties
Each cladding product comes with specific installation instructions. Ignoring these guidelines represents false economy. Not only does it compromise installation quality, but it also typically voids manufacturer warranties.
Read and follow all manufacturer specifications carefully. These guidelines exist to ensure optimal performance and longevity. Pay particular attention to:
- Recommended fastener types and spacing
- Required expansion gaps
- Approved installation methods
- Maintenance requirements
- Environmental considerations
Professional installers respect these guidelines religiously. Therefore, whether hiring contractors or undertaking DIY projects, treating manufacturer instructions as non-negotiable rules proves essential.
Hiring Inexperienced Installers Increases Risk
Cladding installation requires skilled professionals with specific experience. Even top-grade materials fail when installers lack proper training. Without expertise, workers make serious mistakes that ruin finishes and create long-term problems.
When selecting contractors, request evidence of previous cladding projects. Review client testimonials and inspect completed work if possible. Furthermore, ensure qualified supervisors monitor critical aspects like alignment, surface preparation, and joint spacing.
Cost-cutting on labor often results in higher rework costs and damaged materials. At LawnKing Gardens, we’ve seen similar patterns with artificial grass installation – professional expertise always delivers better value than amateur attempts.
Failing to Seal Cut Edges Properly
Exposed or unsealed edges absorb moisture readily. This leads to swelling, warping, and deterioration over time. Many installers overlook this crucial step, creating vulnerabilities throughout the system.
Seal all cut edges with recommended products before installation. Use appropriate touch-up paint or sealant specifically designed for your cladding material. However, exercise caution – avoid getting paint on board faces, which can create appearance issues.
This step requires minimal time but provides maximum protection. Additionally, it demonstrates the attention to detail that separates professional installations from amateur work.
Ignoring Local Climate Conditions
Honeydew and Northriding experience specific weather patterns that impact cladding performance. Installers who ignore these conditions create systems prone to failure.
Consider sun exposure carefully. East or north-facing areas receive less direct sunlight, potentially creating moisture accumulation. Choose cladding materials suited to these conditions. Additionally, apply appropriate treatments to resist UV damage, particularly important in South Africa’s intense sunlight.
Plan installations around weather forecasts. Avoid working during extreme heat or impending rain. Proper timing ensures adhesives cure correctly and materials acclimate appropriately. The same weather awareness applies when we schedule instant lawn installations – environmental conditions significantly impact success rates.
Missing or Inadequate Flashing Installation
Flashing directs water away from vulnerable points. Without proper flashing at roof-to-wall junctions, window openings, and cladding bases, water infiltrates behind panels. This oversight causes some of the most expensive damage homeowners face.
Install high-quality flashing at all critical points. Ensure continuity with no gaps at joints, corners, or terminations. Furthermore, verify flashing integrates correctly with the cladding system, creating effective water-shedding pathways.
Regular inspections help identify flashing problems early. Address any wear or damage immediately to prevent water intrusion. Professional maintenance catches issues before they become costly repairs.
Selecting Inappropriate Materials for Applications
Not all cladding materials suit every environment. Each type possesses unique properties regarding porosity, hardness, UV resistance, and weather tolerance. Using inappropriate materials for specific locations results in premature weathering, staining, and structural failure.
Research material properties thoroughly before purchasing. Consider your specific application:
- High-traffic areas require more durable options
- Shaded locations need moisture-resistant materials
- Sun-exposed surfaces demand UV-stable products
- Coastal or high-humidity areas benefit from specific treatments
Match materials to your exact requirements. This strategic approach parallels how we recommend different artificial grass pile heights for various applications – one size never fits all situations.
Skipping Post-Installation Maintenance Planning
Even perfectly installed cladding requires ongoing maintenance. Many property owners mistakenly assume cladding needs no attention after installation. This oversight leads to preventable deterioration and shortened lifespans.
Develop a maintenance schedule immediately. Regular tasks include:
- Cleaning surfaces to remove dust and pollutants
- Inspecting for damage or loose sections
- Checking and reapplying protective treatments
- Verifying proper drainage function
- Addressing minor issues before they escalate
Schedule professional inspections annually. Experienced eyes spot developing problems that untrained observers miss. Moreover, documented maintenance often proves valuable for insurance claims and property transactions.
Learning From Professional Experience in Honeydew and Northriding
Avoiding these common cladding installation mistakes requires knowledge, planning, and attention to detail. Every step matters – from initial surface preparation through ongoing maintenance. Furthermore, professional guidance eliminates guesswork and ensures proper execution.
At LawnKing Gardens, we’ve witnessed how proper installation techniques transform properties throughout Honeydew, Northriding, and surrounding areas. The same principles that guide our artificial grass installations apply to all outdoor improvements – quality materials combined with expert installation deliver lasting results.
Therefore, whether you’re planning new cladding or evaluating existing installations, understanding these common mistakes helps you make informed decisions. Moreover, investing in proper installation always costs less than repairing preventable problems later.
Professional installations protect your property investment while enhancing aesthetic appeal. Take time to plan carefully, select appropriate materials, and ensure experienced professionals handle the work. Your Honeydew or Northriding property deserves nothing less than excellence.
For expert outdoor installation services throughout the northern suburbs, contact LawnKing Gardens today. We bring the same attention to detail to every project, ensuring beautiful, lasting results that enhance your property value.
Recent Posts:
- Eco-Friendly and Sustainable Cladding Options for Environmentally Conscious Homeowners in Ferndale and Randpark Ridge
- Cladding Installation Timeline: What to Expect for Your Eagle Canyon or Ruimsig Property
- How to Choose the Perfect Cladding Colour for Your Little Falls or Bromhof Home
- Modern Architectural Cladding Trends Transforming Homes in Craighall Park and Parkview
- Fire-Resistant Cladding Options for Safety-Conscious Homeowners in Northcliff and Linden